Halloween Fun with Mother and Daughter Doc McStuffins and Lambie Costumes

Doc McStuffins and Lambie/Mother and Daughter Costumes

Doc McStuffins and Lambie/Mother and Daughter Costumes

Mommy and Quinn Lambie and DocI truly do enjoy having a child; one reason is because we have formed such a special bond in such a short duration of time. Another is that she brings out the child in me. While some people stick up their noses at the idea of parent and child dressing alike or think it’s corny, I’m one of those mothers who loves having coordinating outfits with my daughter. They usually are not identical, but there is a color theme or character theme uniting them.

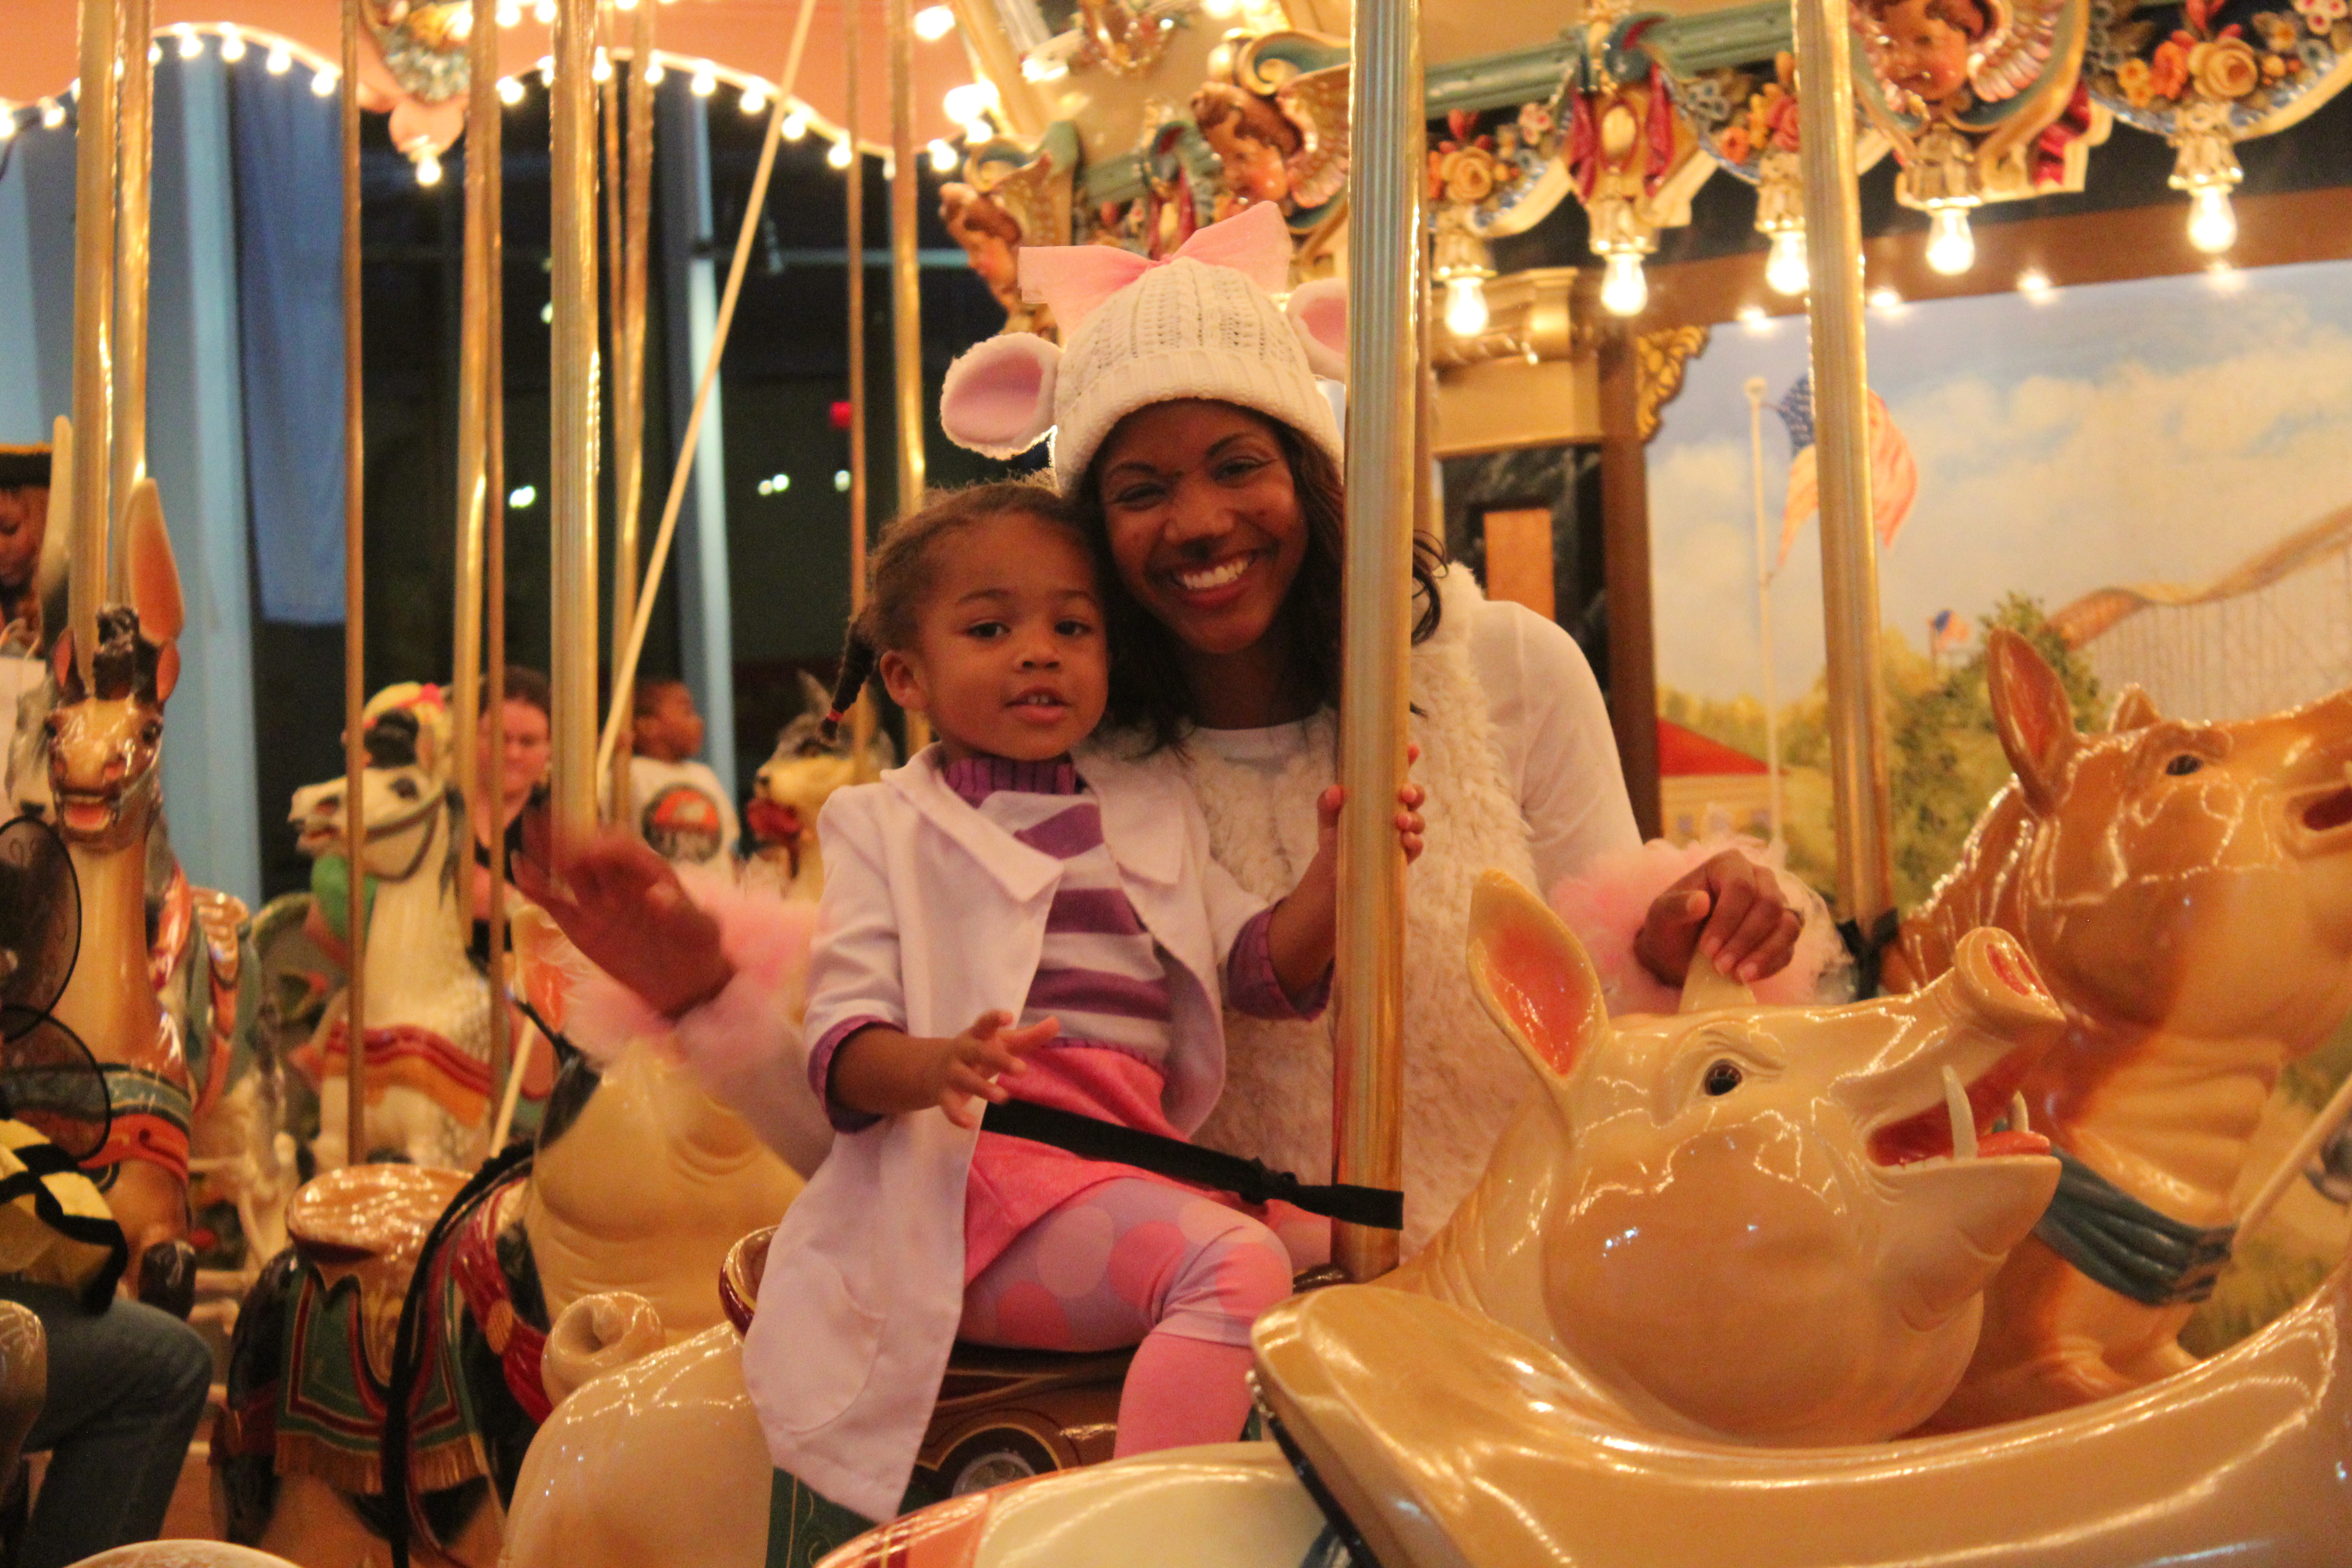
Halloween is an excellent opportunity to display that mother/daughter bond. Last year, Quinn and I were super heroes to get the most out of the costumes from her first birthday party with a super hero theme; she was Super Quinn, and I was Super Mom. This year, Quinn wanted to be Doc McStuffins, so I, of course, had to be Lambie, Doc McStuffins’ helpful stuffed toy lamb and friend. Yesterday, Quinn and I went to The Please Touch Museum’s Halloween Monster Mash Bash donning our costumes. Though we spotted two other Doc McStuffins, we were the only Doc and Lambie duo and received several compliments on our costumes; there were even a few people who asked if they could take a picture of us.

While I was able to find and purchase Quinn’s Doc McStuffins costume at a local Halloween store, with a 20 percent off coupon of course, mine was not as easy. I did an online search for a lamb and even a sheep costume but only found costumes for young children. Then it occurred to me, I’m crafty and love special projects; why not create my own costume? Since I received so many compliments on my Lambie costume, I figured I share what I did to create it if you are in a similar situation.

Firstly, I purposely selected clothing items that I could potentially use in the future so that I could justify spending money beyond what I anticipated to make the costume.

Target was actually my “go-to” store for most of my outfit. I purchased my knitted hat for $14. The lamb faux fur vest, which was the most costly item at $34.99, a long sleeve white shirt for $8 and pink tutu socks for $2. (Though the total is $59, I had a $5 gift card and saved $3 more by using my Target debit card for a total of $51)

Amazon was my other “go-to.” I ordered my white fleece tights for $11.99 through them and a pair of white yoga pants for $14.95 as a back-up since we have a few outings lined up, and know I will wear them in the future. Though I liked the fit of the yoga pants better because of my height, (I am about 5′ 11”) I opted to wear the tights, which are for a woman of average height, to the Please Touch Museum because they went better with the tutu socks and were fitted around the ankle instead of loose. I also ordered my pink tutu through Amazon, which was far cheaper than getting it from one of the Halloween or party stores for just $10.

To pull the rest of the costume together, I ordered the lamb ears and tail through an Etsy business, TechnicandyLand for $14. They were good quality and had clips so that I could easily attach them onto my beanie hat or even clip them to my hair if I wished. I used elastic crotchet hair bands from AC Moore for just $1.50 for my wrists (Initially, I intended on doing this for my ankles too but just did not have enough time, so I purchased the socks) and didn’t have to purchase tulle because I had plenty left over from previous projects to make the tutu sleeves along with the signature pink bow Lambie wears, but the cost is usually around $3 or $4 or even cheaper if you have a 50 percent off coupon, which I usually have for AC Moore or Michaels.

In regard to making up my face, I used make-up that I already had available rather than buying a face paint kit.

In adding up the total cost, it’s a little over $100, which certainly is more than I would be willing to pay for a costume at a Halloween store, but when I minus out the clothing I will still wear after Halloween or without it being a special event, the total remaining is about $20. I actually purchased a faux vest for my daughter to wear on one of our coordinated “theme” dressing days. Also, the fun I got from putting together this costume and getting input from Quinn made it all worth it.

All the best,

Tanya

Autumn Fun with My Little One (Part Seven) Please Touch Museum Monster Mash

2015-10-24 21.46.51All week long, I’ve been posting entries on the autumn fun my two year old daughter and I have been having. Unfortunately, yesterday, I failed to post an entry, but it was for a good reason. Quinn, her daddy and I were out partying with her little friend Arya and her parents and having so much fun at the Please Touch Museum’s annual Halloween Monster Mash Bash. When we came home, the bed was calling my name.

Last year, we attended the event and had a great time, but now that she understands the concept of Halloween and was excited about getting dressed up, we had an even better time. As members of the Please Touch Museum, we we granted entry one hour before the general public and able to visit the different food and treat stations. We enjoyed free carousel rides from 4:30 pm to 8:30 pm and took silly pictures in the photo booth as part of our ticket purchase of $15 per person.

In addition to Quinn visiting the different exhibits and activity rooms, such as the supermarket and hospital, we saw a puppet show and were able to snag seats in the front row of the packed auditorium. Quinn actively participated when the puppeteer asked questions of the audience and even asked if she could see the show again. But there was so much more to do, so we didn’t make our way back to the show.

Then, we hit the dance floor where Clifford the Big Red Dog was hanging out, along with many other children with their families, Quinn and her friend Arya immediately began to dance displaying their fancy footwork!

Though we were there for four hours, not counting the time we waited in line to gain entry, the time really flew by, and Quinn was not ready to leave. But my husband jokingly said that I looked like I was having more fun than Quinn. He’s probably right! Seeing the smile on Quinn’s face and hearing her say, “I’m having fun, Mommy!” without me asking her made me feel so good.

All the best,

Tanya

The doctor is in!

The doctor is in!

2015-10-24 19.09.30-1

Fun on the Carousel

2015-10-24 18.26.05

Quinn dancing with Clifford

Autumn Fun with My Little One (Part Six) Creating Super Grover the Pumpkin!

Making a Super Grover Pumpkin with Quinn

Making a Super Grover Pumpkin with Quinn

One of my first entries this week was about having autumn fun with my two year old daughter involved going to a pumpkin patch. She had a great time, happily selected her pumpkin and probably had no idea that we would be decorating it. But when I asked, she knew exactly what she wanted: a Grover pumpkin. Some months back, I did a post on how Quinn likes Elmo but absolutely loves Grover from Sesame Street. So of course, this was who came to mind when I asked her how she wanted to decorate her pumpkin. I was excited to do this project with her because it hadn’t decorated a pumpkin since I was a child myself, but I had to give some thought about how we were going to do this special project.

First, we needed the materials for the basic Grover. They are as follows:

  1. Blue acrylic paint and black acrylic paint (I purchased them from AC Moore using a 50 percent off coupon)
  2. A pink sponge clown nose to resemble Grover’s (Since it’s near Halloween, this was easy to find at Party City for about a dollar)
  3. Jiggly eyes (I purchased these from AC Moore but later saw them at the local Dollar Tree where I would have saved a dollar off of the total)
  4. A red pipe cleaner for the mouth (I actually had one available and didn’t need to purchase it)
  5. Cardboard to make Grover’s body (I used a box I had lying around from an online purchase)
  6. A Sharpee for tracing body parts
  7. Scissors to cut the body
  8. Hot glue and hot glue gun to adhere the eyes, nose, and mouth
  9. Paint sponges brushes and a cup to hold the paint (I had some from a previous project)
  10. A ruler or tape measure

When Quinn saw the progress we were making, she asked if we could make Super Grover. So Super Grover the pumpkin became. I just needed to figure out how to do it and what additional materials I would need.

  1. Card stock or thick scrap book paper (I got this at AC Moore with a coupon too, so I only paid 25 cents.)
  2. Aluminum Foil (I had this available)
  3. One gray felt sheet, one red felt sheet and one yellow felt sheet (Purchased at AC Moore)
  4. Marker for tracing the red letter G and the yellow lightening bolt (I used a fine point Sharpee that I already had)
  5. About ten paper fasteners (I actually had from a project years prior)
  6. Regular glue that dries clear (I already have tons)

Between work, chores and other activities with Quinn, making our pumpkin into Super Grover certainly was not a one day project. It spanned over two weeks: one week for painting the pumpkin and adhering the facial features and the second week for transforming Grover into Super Grover and giving him a body, G, lightening bolt and cape.

Something that I’ve always been good at is looking at a picture or sample and recreating it. Since Quinn has both Grover and Super Grover, I was able to use them as models for doing the pumpkin. Here are the steps I followed, but this was my first time, so feel free to modify them if you want to try to create your own Grover:

  1. Using the sponge brushes, Quinn and I painted the entire pumpkin, minus part of the bottom because the top had to dry first. Though the paint dries within an hour, I waited a few hours and then retouched any areas where orange was still showing. After the pumpkin dried over night, we did one more coat and then made sure to paint any parts on the bottom that were still orange.
  2. After the pumpkin was blue, I used Grover as my model and then measured the size of my pumpkin to determine how far apart the eyes, nose and mouth should be from one another. Then, I marked the locations and painted on the black mouth which I let dry for a few hours and then added a couple of more coats.
  3. After the pumpkin was blue with the black mouth, I used my hot glue gun and glue to adhere the jiggly eyes, pink sponge nose and the red pipe cleaner mouth.
  4. Voila, you have Grover!
  5. To turn Grover into Super Grover, I looked at the helmet of Quinn’s Super Grover doll to get an idea of how it was constructed. I then stumbled across a Super Grover helmet template from Sesame Street’s web site which was very helpful in creating the helmet. Once I saw this, I was able to determine how many sections would be needed. I did five: one for the face mask, two for the temples that wrap around the head, one for the little piece on the front of the face mask and one for to cover the circumference of the head, which I measured with measuring tape.
  6. After figuring out the size of the pieces I would need, I traced them out using the scrap book paper (with the exception of the piece to cover the circumference of the head which was gray felt and left for the last part), cut them but left a little extra paper for the two pieces to wrap around the temple so that I could double check my measurements by putting it around the actual pumpkin. Then, I covered them with aluminum foil and used a little glue to make sure the foil stayed on the paper. The paper fasteners were used to hold the helmet together and to add the felt which would cover the head. Of course, we put the helmet on Super Grover the Pumpkin’s head to make sure it would fit, and it did!
  7. Then it was time to make Super Grover’s body. Once more, I looked at the model and viewed a few pictures online to get an idea of the body proportions and then used cardboard from an old package box and a Sharpee to draw the torso, arms and legs with some of Quinn’s help (I actually used one piece for the legs but cut a triangular shape in between so that presence of the two legs were obvious. Once I cut out the body parts, I used more of my trusty paper fasteners to connect the arms and legs to the torso.
  8. My daughter actually did most of the painting with the body of Super Grover with some of my help in going over any areas she missed. We then let the one side dry for a few hours and then did the other side.
  9. While Super Grover’s body was drying, we got to work on his red letter G, yellow lightening bolt and red cape using the felt sheets. This also involved looking at the model Grover, measuring the torso of Super Grover and then tracing out the appropriate pieces.
  10. Once our trusty super hero was all dry, about a few hours later, we were able to add the lightening bolt and G with a little regular glue and then the red cape with a little glue.
Quinn and her Super Grover and Super Grover the Pumpkin

Quinn and her Super Grover and Super Grover the Pumpkin

We just finished earlier today, and Quinn was so excited asked, “Can we take a picture with my two Super Grovers?” Of course, I was happy to oblige. Yes, this project was quite involved, but it was a wonderful opportunity to do something fun and special with my little girl. There’s actually a decorative contest at my job next week, and I am thinking that Quinn and I should enter it. How awesome would it be for our Super Grover to win!

All the best,

Tanya

Autumn Fun with My Little One (Part Five) Let’s Make Like a Tree and Leave, Leaves!

Quinn Loves Raking Leaves

                                 Quinn Loves Raking Leaves

All this week, I’ve been posting blog entries about the autumn fun my two year daughter and I have had thus far this season. While going to a pumpkin patch, the zoo for a little trick-or-treating and putting on a festive Halloween outfit have all been fun; there’s one activity we just did that may not necessarily be delightful for adults but certainly is for most young children. It can be labor intensive and sometimes feel never-ending for some adults; it’s raking leaves! Yesterday, as we were returning from The Little Gym, and going up the steps to our home, my daughter turned to me and said, “Look at all these leaves, Mommy! We have to clean up all these leaves! Please!” Wow, now that is delightful: a child who is eager to help do a chore. I promised Quinn that we’d clean up the leaves today when I got home from work, and she was elated. It actually was the perfect day for raking leaves: a comfortable 77 degree autumn day. While I had the big rake, Quinn had her little rake helping to build up the pile of leaves. “Oh boy; that’s a huge pile of leaves,” she said with jubilation as she got ready to jump in the leaves. Unlike last year, when she threw the leaves everywhere, she actually tried to keep them all in the pile together. After about an hour, she was ready to call it a day, but she had a great time. When my husband came out on the porch to see how she was doing, with a big smile on her face, she screamed out, “Daddy, I was working! Look at all those leaves in the huge pile!”

Let’s hope this activity continues to be fun as Quinn gets older and that she holds on to that excitement when she rakes up that “huge” pile of leaves.

All the best,

Tanya

Autumn Fun with My Little One (Part Four) Festive Style of Dress for Halloween

2015-10-10 08.23.39-1
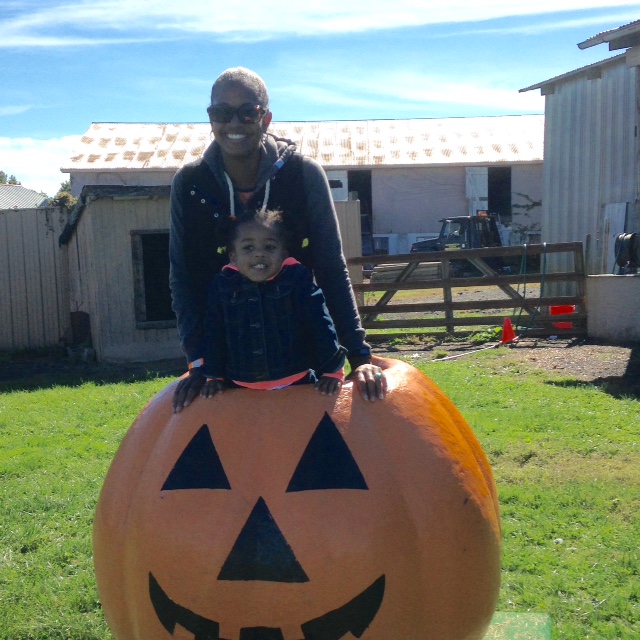
This week, I have been posting blog entries about the autumn fun my daughter and I have been having. While I have discussed activities, such as going to a pumpkin patch, making a scary pancake and going to the zoo for some trick-or-treating fun, there’s one activity that is tons of fun for my daughter yet does not require much. It’s simply being festive. For my daughter’s first two years of life, I have purchased cutesy outfits for her to wear for different holiday seasons, such as Easter, Christmas and even Saint Patrick’s Day. Halloween is no different, but this is the first year that Quinn actually picked out her own outfit. Months before October arrived, we were shopping in Burlington Coat Factory (who has some good deals and finds, by the way) she asked, “Mommy, can we get the Halloween shirt with Dora? I love Dora!” I was first taken aback that she knew about Halloween and then did not hesitate to say yes and imagined how cute she would look in the shirt. Then, when were in another store, Target, Quinn actually remembered what her shirt looked like that we purchased a couple of months prior and said, “Mommy, these pants match my Halloween Dora shirt!” I was could not believe that she remembered, and could not resist purchasing them to go with a jean skirt she already had. Quinn was so excited when she got to wear her outfit and asked me to take her picture. She even did a little dance singing, “Halloween!.” I just love how she is into the Halloween festivities. It gives me a chance to be “into them” again.

All the best,

Tanya

Autumn Fun with My Little One (Part Three) Boo at the Zoo

Quinn Riding a Camel at the Zoo

Quinn Riding a Camel at the Zoo

I just love the month of October, and not just because my birthday is October 11th but because it’s a month full of fun activities for my two year old daughter. During the summer, I posted an entry about how much fun Quinn has at the Philadelphia Zoo. That fun is magnified for two weekends in October as Quinn is able to not only see lions, giraffes, zebras and monkeys (and many more animals) but little robots, aliens, dragons, doctors and several famous characters from some of her favorite shows.
This past Saturday, Quinn and I got our money’s worth from our zoo membership and attended the Boo at the Zoo event along with several other families and children. Though we went last year, Quinn was not fully aware of the concept of children wearing costumes, but this year she giddily pointed out every character she recognized. “Mommy, there’s Minnie Mouse! Look, I see a princess! Oh, there’s another Minnie Mouse. That’s two!” Also, Quinn was able to practice saying, “Trick or Treat” at the different stations where she received candy. (Which she rarely has but was excited to have put in her bag). I was so proud of her for putting her shyness aside and saying “Trick or Treat” and “Thank you” without me prompting her to do so. This certainly was a great trial run. On top of trick or treating, Quinn and I both enjoyed craft activities, riding on the carousel, a draft horse and a train. Since the weather was brisk, the camel was a bit temperamental, so only children were permitted to ride. At first, I was a little nervous about Quinn being on the camel by herself, but she put on her serious face, held on like a big girl and told me she had fun riding the camel. If you are in the Philadelphia area, the Boo at the Zoo event continues this upcoming weekend, October 24th and 25th. It is fun for the entire family, and I highly recommend it if you are looking for an alternative to taking your child or children trick or treating or are just looking for another outing for full of fun activities.

All the best,

Tanya

Autumn Fun with My Little One (Part Two) Scary Pancake Face at IHOP

Quinn's Scary Face Pancake at IHOP

Quinn’s Scary Face Pancake at IHOP

Now that summer has officially drawn to a close, and we are well into autumn, I’ve been looking for fun activities for my daughter. Going out to eat is a special treat she enjoys, but she can be finicky with her eating habits. One place we can rely on is IHOP for pancakes, so this past Friday, we went to the location in Jenkintown, PA, which is just a few miles up the road. Who would have thought that we would have stumbled upon some autumn fun as a part of our dining experience? With Halloween approaching, IHOP is offering a special for children under twelve to decorate their own scary face pancake, which Quinn was very eager to do.  As this activity put a smile on her face, it put smiles her father’s face and mine too because, as a bonus, the meal is free on Fridays for children. She knew exactly how she wanted to design her scary face pancake and was even hesitant to eat it because she didn’t want to destroy its face. We even took a portion of it home, and she sadly exclaimed, “Oh no! My pancake’s scary face is ruined! Can we make another?” Of course,  I am happy to oblige and looking forward to making some more scary face pancakes in the days and weeks to come.

All the best,

Tanya

Autumn Fun with My Little One at Sleep Hollow Pumpkin Patch (Part 1)

Autumn Fun and Sleep Hollow in Active Acres

Autumn Fun and Sleep Hollow in Active Acres

A few weeks ago, I posted an entry about how I was already beginning to miss some of the fun summer activities with my two year old daughter yet eagerly anticipating what autumn would bring. So far, October has been a month full of fun for us both. While Quinn has been exposed to some new experiences along with some traditions initiated last year, I’ve been able to keep my inner-child alive and get pleasure from seeing the delightful smile on my daughter’s face. Last weekend, we went to a pumpkin patch, Sleepy Hollow Pumpkin Patch in Newtown, PA. The year prior, we went to Shadybrook Farm, which is just a few miles away. After attending both locations, I do prefer Shadybrook Farm for toddlers because it has a few more age appropriate activities and did have a more tamed pumpkin patch without the overwhelming amount of wild weeds with prickly vines and plants. Unfortunately, at Sleepy Hollow Pumpkin Patch, Quinn was unable to walk around freely in the pumpkin patch to pick out her own pumpkin for fear of her getting poked by some of the plants with dangerous spikes. I was glad I had on jeans as I got poked by a few.

As I shook my head wishing that we stuck with the same pumpkin patch from last year, thinking that this was going to have a negative impact on her experience, Quinn did not seem to mind being carried by her dad and pointing out pumpkins she liked. Actually, she enjoyed the hayride to the pumpkin patch, seeing the farm animals and scarecrows, running around and directing us through the corn maze, playing with the water pump, jumping in the moon bounce and riding on the pony. Also, the people there were very friendly and ensured that we had a nice time and enjoyed the activities. She repeatedly kept saying, “I’m having fun Mommy!” She taught me that everything does not have to always “fall” into place to have a great time. Here’s to autumn fun with my little one!

All the best,

Tanya

How My Toddler Made My Birthday Even Happier!

Happy Birthday to Mommy

Since I can remember, I’ve always looked forward to celebrating my birthday. Being with family and friends, having cake and ice cream, singing happy birthday, blowing out candles to make a wish and of course the occasional gift or two always put a smile on my face. As I’ve matured,  however, the anticipation of celebrating my birthday along with some of my favorite rituals have faded over time. Maybe it’s because as we get older people don’t make a big of a deal about birthdays as they did when we are younger. While I appreciate each year I’ve been blessed to see, 2015-10-11 18.15.29I do miss that feeling of butterflies I used to get the day before my birthday and then the day of wondering what my family and friends had planned for my special day. Each year, my husband makes me feel special, which I greatly appreciate, but this year, for the first time, my two year old daughter made my birthday even happier by bringing out my inner child. She was so excited that it was my birthday and insisted on singing happy birthday to me throughout the course of the day with a big smile on her face. Then she insisted that I wear a party hat she supplied because what’s a birthday without a birthday hat? “Oh, boy mommy! Look at your birthday cake!” Quinn clapped and giggled. “It’s time to sing happy birthday to mommy!” The joy she had on my special day truly filled me up with happiness. Celebrating my birthday with my little girl (and my husband and mother too) reminds me of how much I love my life and family and how grateful I am to live another year. Thanks for making my birthday even happier my sweet little girl.

All the best,

Tanya

Something Special About My Toddler’s Smile

Quinn's Infectious Smile

Quinn’s Infectious Smile

It’s been a little over two years ago since my daughter, who was just two months at the time, inspired me to post a blog entry philosophizing over why humans are not natural born smilers and typically do not begin displaying smiles until about two to three months old. Within these past two years of watching Quinn grow into a toddler, her smiles and giggles have been infectious and often brighten up my day when it’s been hectic or I simply have a lot on my mind. I truly believe that at the tender age of two she understands the power behind a smile and is compassionate and empathetic enough to comfort others when they are frowning to put a smile on their faces.

When she’s sneakily trying to get an extra snack or sticker, she’ll display a big grin in hopes that she can make a fast getaway. There are even times when she is in “no-gotiator” mode (saying no to everything and every request), yet she will still have a smile on her face that is hard to resist. If she sees a disgruntled look on my face, she’ll come up to me with a big smile and wrap her arm around me saying, “What’s wrong, Mommy?”

There truly is something special about her smile. When I think about how much she is learning and how intense it must be for her as a toddler processing so many new experiences and tasks, it warms my heart that she smiles far more than she frowns. As an adult going through my own experiences and tackling multiple tasks, I hope I can continue to take a page from my daughter’s book and smile far more than I frown because there truly is so much for me to be grateful and happy about: my daughter clearly being one of those reasons!

All the best,

Tanya